

For a long time, I’ve collected scraps of information, quotes et cetera and these are scattered across various storage mediums ranging from the humble Post-it note, scraps of paper, computer files to my Common Place book. Needless to say, it is now time to try and if not organize then at the very least get them into a single storage facility in some approximate groupings by subject.
This led to much research that went precisely nowhere fast and if anything left me feeling about as confused as I ever hope to be. It seems that when you jump into the organisational rabbit hole everywhere you look there is a solution that claims it wit will revolutionise your life, data and so on and as far as I could see most of them would simply create more work for me whilst leaving me with the illusion of being more organised.
At this point I escaped the rabbit hole and decided to seek simplicity and it was then that I remembered I had a rather nice Osco 5”x3” index card box at which point I thought “It can’t be much simpler than a stack of index cards and dividers.”
And I think I might be onto something; because you can add, subtract, divide, sub-divide and reshuffle the cards to your hearts content making it a very nifty organisational tool.
However, my plan hit a bump in the road when I tried to buy blank 5”x3” dividers; if you want A-Z dividers there is a world of choice, but blank ones not so much.
Allow me to explain, the standard A-Z dividers are fine for some things but because I have such a variety of scraps of information, I needed dividers that would allow me to write on the raised tab to enable me to uniquely identify each section.
After scouring Amazon and countless other sites to no avail so I started looking at other options I could ‘tweak’ to meet my needs but most of the options would need extensive ‘tweaking’ and this seemed like a lot of hard work and waste, so I kept on looking and eventually I stumbled upon Nobo T Cards (Size 3) in yellow.
I reasoned that these would give me a good-sized tab (approximately 90mmx10mm) for writing section titles on and would only need very minor ‘tweaking’, approximately 29mm cut off the bottom of the T and the offcut would be suitable for use as a bookmark.
So, I ordered some T Cards and some assorted 5”x3” cards to experiment with; the T Cards come in a variety of colours, but I opted for yellow and did the following:
Step 1: Buy the cards, colour/s of choice.

Step 2: Assemble your tools.
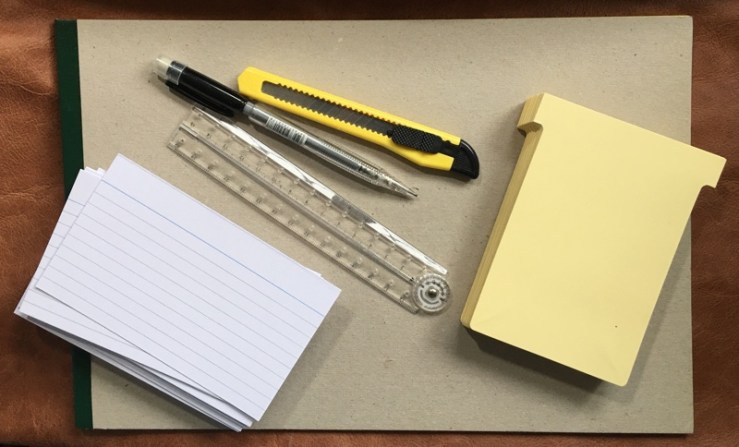
Step 3: Measure & cut

Step 4: Check your measurement.

Step 5: Start using them.

As you can see, I left the raised tabs at their original size; until I start working with them, I will not know if they need adjusting, I suspect not but if they do it’s easy enough.
And that’s Hints & Tips No.3; I hope it was useful.
Disclaimer: All of the cards were purchased with my own funds at retail price. The opinions expressed in this review are my own; and I am not connected with either the retailers or
